We’re diving into the heart of traditional Japanese sweets with our take on Uiro, a chewy and delightful treat that’s as fun to make as it is to eat. Originating from the cultural streets of Nagoya, Uiro is a steamed cake made from rice flour and sugar, boasting a texture that’s uniquely satisfying. Its simplicity is its charm, making it a versatile canvas for a variety of flavors, from matcha to azuki bean.
Join us as we explore the art of making Uiro, a process that’s surprisingly straightforward but promises an authentic taste of Japan right in your kitchen. Whether you’re a seasoned connoisseur of Japanese cuisine or a curious foodie looking to expand your culinary horizons, this recipe is bound to pique your interest. Let’s embark on this sweet adventure together, creating a treat that’s sure to delight your taste buds and maybe even transport you to the bustling streets of Nagoya.
Ingredients for Uiro
Continuing our sweet journey into making Uiro, the next crucial step involves gathering all the necessary ingredients. Here’s everything you’ll need to create these delightful treats, ensuring you capture the authentic flavor and texture that makes Uiro so special.
Uiro Flour Mix
- 1 cup rice flour (fine, glutinous rice flour is preferred for that iconic chewy texture)
- 1 cup water (for dissolving the sugar)
- 3/4 cup granulated sugar (adjust based on your preference for sweetness)
Coloring and Flavoring Options
For those looking to add a dash of color and taste to their Uiro, here are some popular options that complement the base mix wonderfully:
- Matcha powder, 2 teaspoons (for a vibrant green color and a rich, earthy flavor)
- Red bean paste, 1/2 cup (for filling or mixing into the dough, offering a sweet and slightly nutty taste)
- Food coloring, a few drops (for achieving your desired color without altering the flavor)
- Yuzu zest, 1 tablespoon (to introduce a refreshing, citrusy note to your Uiro, perfect for a summer treat)
Mix and match these additions to the Uiro Flour Mix to customize your very own Uiro experience. Whether you choose to keep it simple or experiment with different flavors and colors, the joy of making Uiro comes from the process and the delicious results waiting at the end of your culinary adventure.
Tools and Equipment Needed
Embarking on our Uiro-making adventure, it’s crucial to gather the right tools and equipment to ensure a smooth and enjoyable experience. Here, we’ll outline the essentials, keeping the process as authentic and efficient as possible. Our journey into the delightful world of Uiro is made easier with these items at our disposal.
Steaming Setup
First and foremost, a steamer is key. If you don’t have a traditional Japanese steamer, any large pot with a steaming basket will do. Ensure it’s large enough to hold the mold or dish you plan to steam the Uiro in, with enough space for the steam to circulate.
Mixing Equipment
A large mixing bowl is essential for combining our Uiro ingredients. You’ll need a sturdy whisk or a spatula to mix everything thoroughly, ensuring an even, smooth batter without lumps.
Measuring Tools
Accuracy is vital in making Uiro, so having a set of measuring cups and spoons on hand is important. For the most precise results, consider using a kitchen scale to weigh your ingredients, especially the rice flour and sugar.
Molds or Pans
Traditionally, Uiro is steamed in a rectangular or square mold to achieve its classic shape. If you don’t have a traditional Uiro mold, any heat-proof dish with similar dimensions, like a square baking pan, can work as long as it fits inside your steamer.
Parchment Paper
Lining your mold or pan with parchment paper is a handy trick to prevent sticking and make removal of the Uiro easier after steaming. Just be sure to leave some overhang for easy lifting.
Toothpick or Cake Tester
Having a toothpick or a cake tester on hand is useful for testing the doneness of your Uiro. When inserted into the center, it should come out clean if the Uiro is properly cooked.
With these tools and equipment ready, we’re all set to dive into the meticulous process of making Uiro. Each item plays a crucial role in turning simple ingredients into a delightful, chewy treat, ensuring our journey into traditional Japanese sweets is as fulfilling as it is delicious.
Preparing the Uiro Mixture
Now that we’ve gathered our tools and ingredients, let’s dive into the heart of making Uiro—preparing the mixture. This step is key to achieving that perfect chewy texture and authentic flavor.
Mixing Dry Ingredients
We’ll start by combining the dry ingredients. In a large mixing bowl, sift together 1 cup of rice flour and ¾ cup of sugar. If you’re making a flavored Uiro, like matcha or yuzu, now is the time to add your chosen ingredient. For matcha Uiro, incorporate 2 tablespoons of matcha powder into the dry mix. This not only adds a vibrant green color but also a subtly earthy flavor that complement the sweetness of the Uiro. Ensure all dry ingredients are thoroughly mixed to avoid any lumps. This step is crucial as it guarantees a smooth texture in our final product.
Adding Water and Flavoring
Once our dry ingredients are evenly mixed, it’s time to gradually add in 1 cup of water while stirring constantly. The goal is to create a smooth, lump-free batter. If you’re opting for a fruit-flavored Uiro, such as yuzu, you can add 1 tablespoon of yuzu zest at this stage for a citrusy tang. For those making azuki bean Uiro, you would fold in ½ cup of azuki bean paste once the water is fully incorporated. Stir the mixture until it’s well combined and has a silky consistency. This creates the base of our Uiro, ready to be steamed into a chewy delight. Remember, the quality of your Uiro heavily relies on the consistency of this mixture, so take your time to ensure it’s just right.
Cooking Process
Now that we’ve prepared the perfect Uiro batter, it’s time to move on to the cooking process. Steaming is a critical step in achieving the characteristic chewy texture of Uiro, so follow these instructions carefully for the best results.
Steaming the Uiro
- Prepare the Steamer: Fill your steamer with water and bring it to a boil. While waiting, ensure your molds or a baking pan are lined with parchment paper to prevent sticking.
- Pour the Batter: Carefully pour the Uiro batter into your prepared molds or pan. If using different flavors, you can layer or create sections for each flavor.
- Place in Steamer: Once the water is boiling, place your molds or pan into the steamer. Attention to steam levels is crucial; too much steam can lead to a soggy Uiro, while not enough steam can cause it to become too tough.
- Cover and Steam: Cover the steamer with a lid. We recommend wrapping the lid with a cloth to prevent water from dripping onto the Uiro. Steam on medium heat for about 20-25 minutes, depending on the thickness of your Uiro.
Checking for Doneness and Cooling the Uiro
- Initial Check: After steaming for the recommended time, carefully open the steamer. Be mindful of the steam release to avoid burns.
- Toothpick Test: Insert a toothpick or cake tester into the center of the Uiro. If it comes out clean, your Uiro is done. If there’s batter sticking to the toothpick, steam for an additional 5 minutes and check again.
- Visual and Texture Check: The Uiro should have a uniform color, and the surface should be smooth and shiny. The edges will slightly pull away from the sides of the mold or pan, indicating it’s cooked through.
- Cooling Down: Once fully cooked, remove the Uiro from the steamer and let it cool in the mold or on a baking rack. Cooling is as important as cooking since it allows the Uiro to set and develop the right texture.
Follow these steps carefully to ensure your Uiro turns out perfectly chewy and delicious. Remember, practice makes perfect, so don’t be discouraged if your first attempt isn’t exactly as you hoped.
Serving and Presentation
Once your Uiro has properly cooled and set, it’s time to bring creativity to the forefront with serving and presentation. This is where the beauty of this traditional dessert really shines.
Cutting into Shapes
To begin, gently remove the Uiro from the molds, placing them on a clean, flat surface. Using a sharp, wet knife, slice the Uiro into bite-sized pieces or shapes of your preference. Traditional shapes include squares, diamonds, or even intricate floral designs for a more festive look. Wetting the knife between cuts ensures a clean slice through the sticky texture without pulling or misshaping the pieces. For a playful twist, use cookie cutters to create unique and fun shapes, perfect for special occasions or themed parties.
Plating Suggestions
Plating Uiro is an art that combines simplicity with elegance. For a classic presentation, arrange the cut shapes neatly on a ceramic plate or wooden serving board, allowing the colors and cut designs to stand out. If you’ve made Uiro with different colors or flavors, consider arranging them in patterns or in a color gradient for visual impact.
For a more traditional serving style, pair Uiro with a cup of green tea. The bitterness of the tea contrasts beautifully with the sweet, chewy texture of the Uiro, providing a harmonious balance to the palate. Alternatively, serve alongside fresh fruits or a dollop of sweet red bean paste for an added layer of texture and sweetness.
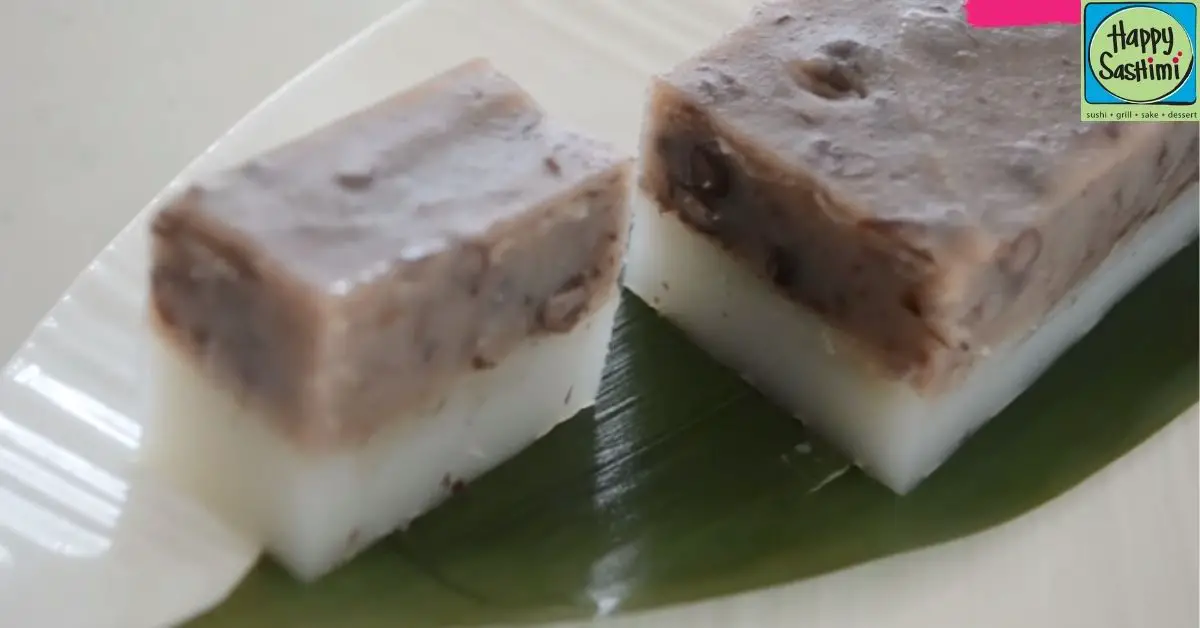
A sprinkle of matcha powder, a few edible flowers, or even a bamboo leaf underneath can elevate the simple Uiro into a stunning dessert ready for any table. Enjoy experimenting with different presentations to find the perfect match for your occasion.
Make-Ahead and Storage Tips
After exploring the creative ways to serve and present Uiro, let’s dive into how you can make this delightful dessert ahead of time and keep it fresh for enjoying later. Uiro is just as delightful made in advance, offering flexibility for those busy days when you wish to prepare a treat ahead of time.
To ensure your Uiro remains chewy and delicious, follow these simple storage tips:
- Cooling Down: Allow the Uiro to cool completely at room temperature after steaming. This step helps prevent condensation inside the storage container, which can make the texture less appealing.
- Refrigeration: Once cooled, transfer the Uiro into an airtight container. You can keep it in the refrigerator for up to 3 days. The low temperature helps maintain its texture and freshness.
- Freezing for Longer Storage: For longer storage, wrap individual slices of Uiro tightly in plastic wrap, then place them in a freezer bag or airtight container. Uiro can be frozen for up to 1 month. When you’re ready to enjoy it, let it thaw at room temperature for a few hours or overnight in the refrigerator.
- Preventing Dryness: If the Uiro seems a bit dry after refrigeration or freezing, you can gently re-steam it for a few minutes to bring back its original chewy texture. Just make sure to keep a watchful eye to avoid over-steaming, which can lead to a mushy texture.
- Serving After Storage: Before serving, consider letting the Uiro sit at room temperature for about 10 minutes. This slight rest period allows it to soften, making it closer to its original texture and easier to cut into your desired shapes.
Conclusion
We’ve walked you through the delightful journey of making Uiro, from the precise steaming process to the art of serving it beautifully. Remember, the key to a perfect Uiro lies in patience and creativity, both in preparation and presentation. Don’t forget our tips on storing your Uiro to keep it fresh and chewy, ensuring it’s always ready to be enjoyed. Whether you’re savoring it with a cup of green tea or showcasing it in a dessert spread, Uiro is sure to leave a lasting impression. So go ahead, give it a try, and let this traditional sweet add a touch of Japanese elegance to your table.
Related Posts:
- Easy Strawberry Preserves Recipe: From Cooking to Serving
- Ultimate Guide to Smoky Confit Beans: Preparation & Storage Tips
- Ultimate Nitamago Recipe: Elevate Your Meals with This Japanese Marvel
- Ultimate Beet Tzatziki Recipe: Fresh, Flavorful & Easy to Make
- Ultimate Gnocchi Alla Bava Guide: Cooking, Serving & Storage Tips
- Easy Uiro Recipe: Make Traditional Japanese Chewy Sweets at Home
