We’ve all had those days when nothing but a warm, comforting bowl of curry will do. That’s why we’re thrilled to share our take on a classic that’s close to our hearts: Japanese curry chicken. This dish, a beloved staple in Japan, marries the intricate flavors of curry with the simplicity of chicken and vegetables, creating a hearty meal that’s both satisfying and surprisingly easy to make.
Japanese curry stands out for its unique blend of spices and a thicker, sweeter sauce compared to its South Asian counterparts. It’s a recipe that’s been adapted over the years, making its way into the hearts and kitchens around the world. Whether you’re new to Japanese cuisine or a seasoned pro looking for comfort food, this recipe promises to deliver a delicious experience. Let’s dive into the warm, inviting world of Japanese curry chicken together.
Ingredients for Japanese Curry Chicken
Building on the warm and inviting world of Japanese curry chicken we just introduced, let’s dive into the ingredients you’ll need to recreate this comforting dish at home. Remember, the beauty of this recipe lies in the blend of spices and the heartiness of the ingredients.
For the Chicken
- 1 lb (about 450g) boneless, skinless chicken thighs, cut into bite-size pieces
- Salt and pepper, to taste
- 2 tablespoons vegetable oil, for frying
- 1 tablespoon flour, to coat the chicken
For the Curry Sauce
- 2 tablespoons vegetable oil
- 1 large onion, thinly sliced
- 2 medium carrots, cut into chunks
- 2 medium potatoes, cut into chunks
- 2 cloves garlic, minced
- 1-inch piece ginger, grated
- 4 cups (950ml) chicken broth
- 2-3 tablespoons curry powder, adjust based on preference
- 1 bay leaf
- 1 tablespoon honey
- 2 tablespoons soy sauce
- 1 apple, grated (for sweetness)
- 1 box (about 7-8.4 oz) Japanese curry roux, broken into cubes
- Cooked white rice
- Pickled radishes or fukujinzuke (optional, for garnish)
- Chopped green onions (optional, for garnish)
With these ingredients at hand, we’re ready to move into the heart of cooking this delectable dish. Each component plays a crucial role in creating the rich, thick, and flavorful sauce that lovingly coats the tender pieces of chicken, making every bite an inviting embrace of savory, sweet, and mildly spicy flavors.
Necessary Tools and Equipment
After exploring the essential ingredients for our Japanese curry chicken recipe, it’s time to gather the necessary tools and equipment to bring this beloved dish to life. Ensuring you have the right tools at your disposal can make the cooking process smoother and more enjoyable. Here’s what we recommend you have on hand:
- Large Skillet or Saucepan: A fundamental need for sautéing the vegetables and cooking the chicken to golden perfection before simmering everything in the curry sauce. A deep skillet or saucepan works best to accommodate all the ingredients and the sauce without overcrowding.
- Wooden Spoon or Spatula: These are perfect for stirring the ingredients and ensuring that the chicken and vegetables cook evenly. A wooden spoon or spatula is gentle on your cookware and helps in mixing the curry roux seamlessly into the mixture.
- Cutting Board and Sharp Knife: Essential for prepping your vegetables and cutting the chicken into bite-sized pieces. A sharp knife ensures clean cuts, and a large cutting board gives you ample space to work efficiently.
- Measuring Cups and Spoons: Accuracy is key when it comes to measuring out spices, curry roux, and other ingredients. Having a set of measuring cups and spoons on hand ensures that you get the perfect balance of flavors in your curry.
- Peeler: If you decide to use fresh carrots or potatoes, a peeler will come in handy for quickly and safely peeling the vegetables before cutting them into pieces.
- Rice Cooker (Optional): Since Japanese curry is traditionally served with rice, a rice cooker can simplify the process of preparing the perfect fluffy rice to accompany your curry. Of course, cooking rice on the stovetop is also an option if you don’t have a rice cooker.
Gathering these tools and equipment before you start cooking will help streamline the process, allowing you to focus on the flavors and techniques that make Japanese curry chicken a comforting and delicious meal. Next, we’ll dive into the step-by-step instructions on how to bring all these elements together to create a savory, heartwarming dish that’s sure to impress.
Preparing the Ingredients
Now that we’ve covered the equipment needed, let’s dive into preparing the ingredients for our Japanese curry chicken. This step is crucial for ensuring a seamless cooking process.
Cleaning and Cutting the Chicken
First, let’s handle the chicken. We recommend using boneless chicken thighs for their juiciness and flavor. Here’s how to prep them:
- Rinse each chicken thigh under cold water and pat them dry with paper towels to remove any excess moisture.
- Place the chicken on a cutting board. Using a sharp knife, trim off any excess fat.
- Cut the chicken thighs into bite-sized pieces, about 1-inch cubes. This ensures they cook evenly and absorb the curry flavors well.
Prepping Vegetables
Next up, vegetables. For a classic Japanese curry, we use onions, carrots, and potatoes. Here’s how to prepare them:
- Peel the onions, slice them in half, and then into thin slices. This shape allows them to cook down and sweeten, enriching the curry’s flavor.
- Peel the carrots. Then, cut them on the diagonal into 1/2-inch thick slices. Cutting them at an angle increases the surface area, enhancing their sweetness and texture.
- Peel the potatoes and cut them into 1-inch cubes. To prevent them from browning, soak the cubes in cold water for about 5 minutes, then drain.
Measuring Spices and Condiments
Lastly, let’s measure out our spices and condiments that will bring our curry to life. For this recipe, you’ll need:
- 2 tablespoons of curry powder
- 1 tablespoon of garam masala
- Salt to taste
- Freshly ground black pepper to taste
- 2 tablespoons of cooking oil
- 3 cloves of garlic, minced
- 1-inch piece of ginger, finely grated
Having these spices and condiments prepared and measured before cooking makes the process smoother and ensures each dish layer is perfectly seasoned.
Cooking Instructions
With all the ingredients prepped and the necessary tools at hand, let’s dive into the heart of making this comforting and delicious Japanese curry chicken. Follow these steps to ensure a perfectly cooked dish.
Cooking the Chicken
- Heat a large skillet or saucepan over medium heat and add 2 tablespoons of vegetable oil.
- Once the oil is hot, add the chicken pieces. Season with a little salt and pepper. Cook until the chicken is browned on all sides, about 5-7 minutes. Don’t overcrowd the pan; cook in batches if necessary.
- Remove the chicken from the pan and set it aside. There’s no need to cook it through completely at this stage, as it will continue cooking with the curry sauce later.
- In the same pan used for cooking chicken, add a bit more oil if the pan seems dry. Then add the onions, carrots, and potatoes. Sauté the vegetables for about 5 minutes or until the onions become translucent.
- Add the minced garlic and ginger to the pan and cook for another minute, stirring frequently to prevent them from burning.
- Sprinkle 2 tablespoons of curry powder and 1 teaspoon of garam masala over the vegetables, stirring to coat them evenly with the spices. Cook for another 2 minutes to allow the spices to release their flavors.
- Return the chicken to the pan. Add 4 cups of chicken broth to cover the chicken and vegetables. You might adjust the amount of broth depending on the desired thickness of your curry.
- Bring the mixture to a boil, then reduce the heat to low. Simmer covered for about 20 minutes, or until the chicken is fully cooked and the vegetables are tender.
- In a small bowl, mix 2 tablespoons of flour with 3 tablespoons of water to make a smooth paste. Stir this mixture into the curry to thicken the sauce. Allow the curry to simmer for another 5 minutes. Adjust the seasoning with salt and pepper to taste.
- Optionally, for an extra depth of flavor, add a tablespoon of soy sauce or a pinch of sugar towards the end of cooking.
Enjoy this savory, rich, and heartwarming Japanese curry chicken served over steamed rice or with crusty bread for a complete meal.
Assembling the Japanese Curry Chicken
With our chicken perfectly browned and our curry sauce thickened to just the right consistency, it’s time to bring all the elements together. This step is where our Japanese curry chicken truly comes to life, marrying the robust flavors and tender ingredients into one delectable dish.
Combining Chicken and Curry Sauce
Once you’ve achieved that rich, thick curry sauce and your chicken is cooked through with a nice golden sear, it’s time to combine them. Here’s how we do it:
- Incorporate the Chicken: Gently add your browned chicken pieces into the saucepan containing the curry sauce. The goal is to coat each piece evenly with the sauce, so use a spatula or spoon to ensure all sides of the chicken are covered.
- Simmer for Flavor Melding: Bring the combined chicken and sauce to a gentle simmer. This low and slow heat allows the chicken to soak up all those wonderful curry flavors without overcooking. We recommend simmering for about 5-10 minutes to allow the flavors to meld together beautifully.
- Stir Occasionally: While simmering, give the mixture a few gentle stirs to prevent any sticking to the bottom of the pan, ensuring an even flavor throughout.
Adding Final Touches
Now that our chicken and curry sauce are happily united, it’s time for the final touches that elevate this dish from great to extraordinary.
- Taste and Adjust: Before serving, taste the curry to check the balance of flavors. This is your moment to adjust the seasoning if needed. A pinch of salt or a dash of sugar can make all the difference.
- Garnishes: To add color and a fresh element, sprinkle chopped fresh cilantro or green onions on top. These garnishes introduce a bright contrast to the warm, spicy flavors of the curry.
- Serve with Carbs: The best way to enjoy Japanese curry chicken is by serving it over a bed of steamed rice or alongside some warm, crusty bread. The carbs soak up the curry, ensuring you get that delicious sauce in every bite.
As we plate our Japanese curry chicken, the aroma fills the air, promising a dish that’s not only comforting but also bursting with the intricate flavors that make Japanese curry so beloved.
Make-Ahead Tips
In the spirit of simplifying our lives without sacrificing flavor, let’s explore some make-ahead tips for our Japanese curry chicken recipe. These strategies are perfect for busy schedules or when we want to enjoy this hearty dish with minimal effort on the day of serving.
Prepping Vegetables
First up, handling our vegetables. We can peel, chop, and store them in airtight containers in the refrigerator up to a day in advance. Not only does this save time, but it also makes the cooking process smoother and more enjoyable. Remember to store potatoes submerged in water to prevent them from browning.
Chicken Prep
For the chicken, we can clean, cut, and even season the pieces ahead of time. After cutting the chicken into bite-sized pieces, we might rub a little salt into it, then store it in the refrigerator. This not only seasons the chicken but also helps to tenderize it, ensuring juicy, flavorful bites.
Spice Mix
The essence of Japanese curry lies in its unique blend of spices. Measuring out and combining our spices in advance can be a game-changer. Not only does it ensure we have all the necessary ingredients, but it also allows the flavors to meld together beautifully, creating an even more cohesive flavor profile.
Curry Base
If we’re looking to save time or make our weeknight dinner preparation a breeze, we can cook the curry base ahead of time. Simply follow the steps for sautéing the vegetables, browning the chicken, and adding the broth and spices. Let the curry simmer and thicken, then cool and store it in the refrigerator for up to two days or freeze it for longer storage. When we’re ready to enjoy, we can gently reheat the curry, adjust the thickness if needed, and serve. This method not only intensifies the flavors but also ensures the curry is absorbed into the chicken, creating an even more delicious dish.
Rice Preparation
Finally, for the perfect accompaniment to our Japanese curry chicken, we can prepare our rice in advance. Cooked rice can be stored in the refrigerator and simply reheated when needed. This is especially handy if we’re using a rice cooker with a preset timer. We can have fresh, warm rice without any additional effort on our serving day.
Serving Suggestions
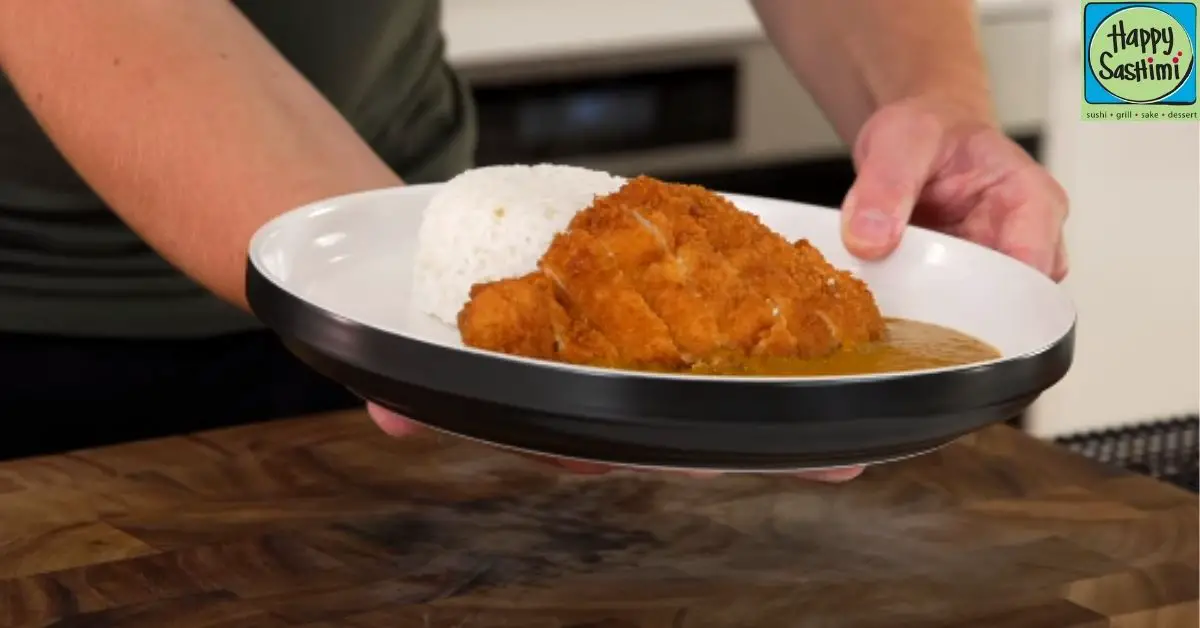
After carefully simmering the Japanese curry chicken to perfection, assembling the savory dish over a bed of fluffy rice or with slices of crusty bread makes for a heartwarming meal. However, the versatility of Japanese curry chicken allows for an array of delightful serving options. Here’s how we love to serve it to make the meal even more memorable.
Rice: Steamed Japanese short-grain rice, often known as sushi rice, is our go-to base. Its sticky texture and slight sweetness complement the rich curry sauce beautifully. Simply scoop a generous portion of rice onto each plate, then ladle the curry chicken beside or over the top. For a healthier twist, brown rice or quinoa also pairs wonderfully with the curry.
Bread: If you prefer a hearty, dipping option, crusty bread or soft dinner rolls serve as perfect vessels for sopping up the curry sauce. Freshly baked or even lightly toasted, the bread’s crisp edges and soft interior absorb the curry, offering a satisfying crunch and savory flavor with each bite.
Noodles: Udon or soba noodles offer a delightful alternative to rice. Boil the noodles according to package instructions, drain, and then place in bowls. Pour the hot curry chicken over the noodles, and stir slightly to ensure the noodles are evenly coated with the sauce. This combination brings a satisfying chew to the meal, blending traditional Japanese flavors in an interesting texture.
Garnishes: To add a pop of color and freshness to the dish, sprinkle finely chopped green onions, cilantro, or a few leaves of fresh basil on top of the curry. A dollop of pickled radish or ginger on the side not only adds a decorative touch but also introduces a tangy contrast that enhances the overall flavor profile.
Pairings: For a complete meal, consider serving the curry alongside a crisp green salad dressed lightly with a simple vinaigrette or a side of pickled vegetables. These sides can help balance the richness of the curry with their freshness and slight acidity.
Storing and Reheating
After savoring the rich and comforting flavors of our Japanese curry chicken, you might find yourself with leftovers. Fortunately, this dish stores and reheats well, allowing you to enjoy it for days after the initial preparation. Here’s how we recommend storing and reheating your curry to maintain its delicious taste and texture.
Storing Leftover Curry
- Cool Down: Allow the Japanese curry chicken to cool to room temperature. But don’t leave it out for more than two hours to prevent bacterial growth.
- Airtight Containers: Transfer the curry into airtight containers. Glass containers are our preference as they don’t absorb the curry’s aroma and are better for the environment.
- Refrigerate or Freeze: If you plan to eat the leftovers within the next three days, refrigerate them. For longer storage, freeze the curry. It’s helpful to portion the curry into individual servings for easier thawing and reheating.
Reheating Stored Curry
Refrigerated Curry
- Microwave: For a quick reheating method, microwave the curry on high power for about 2-3 minutes, stirring halfway through the heating process. Ensure the curry is heated through.
- Stovetop: Alternatively, reheat the curry in a saucepan over medium heat. Stir occasionally, adding a bit of water or broth if the sauce has thickened too much during storage. Heat until the curry is simmering and thoroughly heated.
- Thawing: Before reheating, thaw the frozen curry in the refrigerator overnight. If you’re in a hurry, you can use the defrost setting on your microwave.
- Reheating: Once thawed, reheat the curry on the stovetop or in the microwave following the instructions for refrigerated curry. You may need to add a little extra liquid to bring back the original consistency.
By properly storing and reheating your Japanese curry chicken, you preserve the flavors and textures that make this dish a delightful comfort food. Whether enjoyed as a hearty dinner or a quick and easy lunch the next day, these tips ensure your curry remains as tantalizing as when it was first prepared.
Conclusion
We’ve walked through the journey of making Japanese curry chicken from scratch, sharing our favorite tips and tricks along the way. It’s a dish that brings comfort and a burst of flavors, perfect for any day of the week. Remember, it’s all about the blend of spices and the love you put into simmering that thick, savory sauce. Whether you’re serving it over fluffy rice, bread, or noodles, it’s bound to become a mealtime favorite. Don’t forget to store any leftovers properly—they’re just as delicious the next day. Here’s to making your Japanese curry chicken adventure both fun and rewarding. Happy cooking!
Related Posts:
- Safe Tobiko Consumption During Pregnancy: A Complete Guide
- Japanese Sugar: Blending Tradition with Sustainability
- Is Japanese Curry Healthy? Comparing Nutritional Benefits with Other Curries
- Easy Japanese Curry Chicken Recipe: A Step-by-Step Guide