We’ve all had those moments when we crave something simple yet irresistibly flavorful. That’s where our garlic rice in a rice cooker recipe comes into play. It’s a game-changer for those looking to elevate their rice game with minimal effort. Originating from the heart of many Asian cuisines, garlic rice is a staple that complements almost any dish, bringing a rich, aromatic flavor that’s hard to resist.
What makes this recipe a standout is its simplicity and the magic of using a rice cooker. Gone are the days of watching over a pot, worrying about burning or undercooking. We’ll show you how to turn a few basic ingredients into a fragrant and savory side dish that’ll have everyone asking for seconds. So, let’s get ready to infuse our kitchens with the delightful aroma of garlic rice, all with the push of a button.
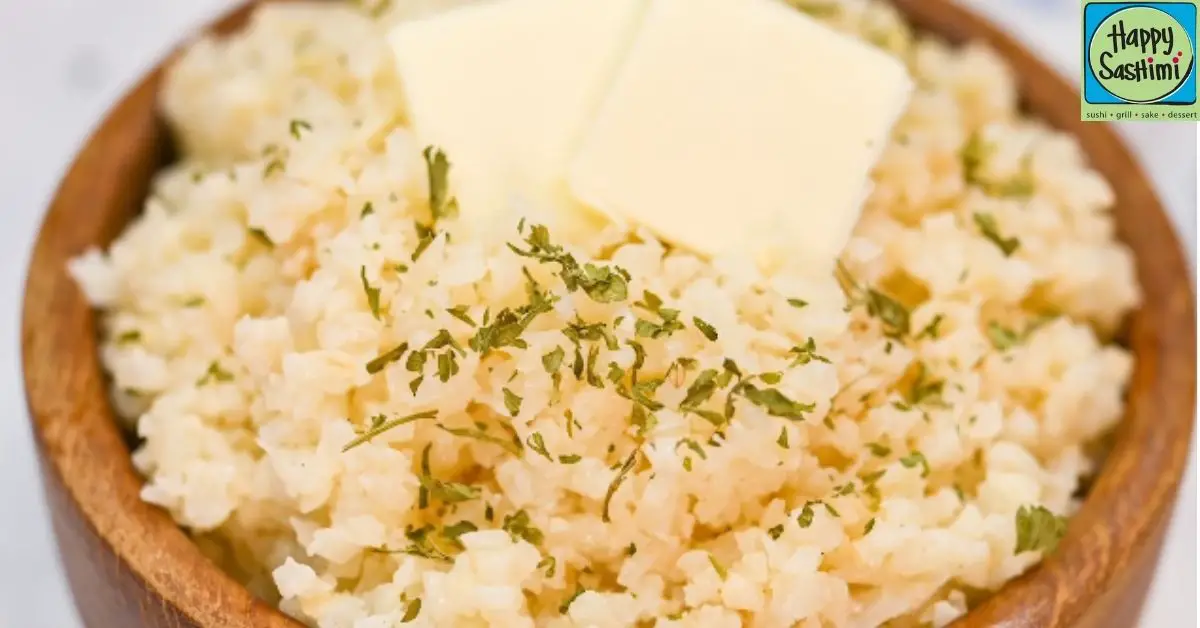
Ingredients
Now that we’ve discussed the simplicity and delightful flavors of making garlic rice in a rice cooker, it’s time to gather our ingredients. This recipe focuses on minimal effort for maximum taste, ensuring a fragrant addition to your meal lineup.
Main Ingredients
- 2 cups of white rice (preferably long-grain or jasmine for their aromatic qualities)
- 4 cups of water (adjust based on your rice cooker’s specifications)
- 5 cloves of garlic, finely minced
- 2 tablespoons of olive oil or butter (for sautéing the garlic)
- 1 teaspoon of salt (adjust to taste)
- 1/2 teaspoon of black pepper (freshly ground for the best flavor)
- Optional: 2 tablespoons of chopped fresh parsley or cilantro for garnish
Required Tools and Equipment
- Rice Cooker: Essential for cooking the rice effortlessly. Ensure it’s in good working condition.
- Measuring Cups: For accurate measurements of rice and water. This ensures the perfect texture.
- Rice Spatula or Wooden Spoon: To fluff and serve the rice without sticking.
Prep Work
Before we dive into the magic of turning simple ingredients into a flavorful dish, let’s tackle the initial steps to ensure our garlic rice turns out perfectly.
Cleaning the Rice
To start, measure 2 cups of white rice and pour it into a fine-mesh strainer. Rinse under cold running water, gently swirling the grains with your hands, until the water runs clear. This process removes excess starch from the rice, preventing it from being too sticky. Drain the rice well to eliminate any remaining water. This step is crucial for achieving the ideal texture in our garlic rice.
Mincing the Garlic
Next, take 4 large cloves of garlic. Peel off the skins, then finely mince the cloves. The goal is to create tiny, even pieces that will distribute evenly throughout the rice, infusing every bite with its aromatic flavor. If you’re a fan of strong garlic flavor, feel free to adjust the amount to taste. Remember, the garlic is a star in this dish, so ensuring it’s minced well will unlock its full potential in our savory side dish.
Cooking the Garlic
Before we dive into the main event of cooking our rice, we focus on an essential flavor-building step: cooking the garlic. This process transforms the raw, pungent taste of garlic into a nutty, slightly sweet, and deeply aromatic component that will infuse the rice with its distinctive flavor.
How to Prepare Garlic in a Pan
First, we’ll need to heat a small frying pan over medium heat. To this, add 2 tablespoons of olive oil or butter, depending on your preference for a richer or lighter flavor. Once the oil is shimmering or the butter has melted and started to foam, it’s time to add your finely minced garlic. For this recipe, we use about 4 cloves of garlic, giving us a robust but not overpowering taste.
Stir the garlic continuously to ensure it cooks evenly. You’ll want to keep a close eye on it; garlic can go from perfectly golden to burnt in a matter of seconds. This process should take about 2 minutes. You’re looking for a light golden color and for the garlic to become fragrant, which is your cue that it’s done. Immediately remove the pan from the heat to stop the cooking process, ensuring our garlic doesn’t turn bitter.
Tips for Perfectly Golden Garlic
Achieving golden and fragrant garlic requires attention and a few kitchen tricks. Here are some tips to ensure success every time:
- Use Low to Medium Heat: High heat can burn garlic quickly, leading to a bitter taste. A steady, moderate temperature allows the garlic to cook uniformly.
- Stir Constantly: Moving the garlic around the pan ensures each piece cooks evenly without sticking or burning.
- Watch for Color Changes: As soon as the garlic begins to turn a golden color, it’s close to being done. This is when it’s most aromatic and flavorful.
- Cool the Pan: If the garlic is cooking too fast or you suspect it might burn, take the pan off the heat for a moment. You can also add a bit more oil or butter to lower the temperature.
By following these steps and tips, the garlic will be perfectly prepared for the next stage, ensuring our garlic rice is bursting with flavor.
Cooking the Rice
Now that we’ve prepared our fragrant, golden garlic, it’s time to bring everything together in the rice cooker for the final and most satisfying step: cooking the rice.
Adding Ingredients to the Rice Cooker
Once your rice is clean and your garlic is perfectly golden, it’s time to combine all the ingredients in the rice cooker. Here’s how we do it step by step:
- Transfer the rinsed white rice into the rice cooker’s pot.
- Add water to the rice. The general rule of thumb we follow is using a ratio of 1:1 for rice to water. However, adjust depending on the type of rice you’re using.
- Stir in the cooked garlic into the rice and water mixture. This ensures that the rich, nutty, and slightly sweet flavors of the garlic are evenly distributed.
- Drizzle olive oil or drop in your choice of butter. Besides adding flavor, this helps prevent the rice from sticking to the pot.
- Season with salt and black pepper according to your taste preferences.
- Mix everything gently one more time to evenly distribute the seasoning and olive oil or butter.
Rice Cooker Settings
Choosing the right setting on your rice cooker is crucial for the perfect texture and taste:
- Select the standard “White Rice” option on your rice cooker if available. This setting is programmed to provide the right cooking time and temperature for white rice.
- In case your rice cooker has multiple settings, opt for a quick-cook setting if you’re in a hurry. However, for the best flavor absorption, we recommend sticking with the regular cooking cycle.
- Once everything is in place, press start and let the rice cooker work its magic. The beauty of using a rice cooker is the set-and-forget convenience it offers.
- Wait for the cooking cycle to complete. Most rice cookers will automatically switch to a “Keep Warm” setting once cooking is finished, keeping your garlic rice perfectly warm until you’re ready to serve.
Remember, do not open the lid too often during cooking as it lets steam escape, which is essential for perfectly cooked rice. The anticipation will be worth it once you fluff and serve this wonderfully aromatic and flavorful garlic rice.
Serving Suggestions
After your garlic rice is beautifully cooked and the enticing aroma fills your kitchen, it’s time to think about how to serve it. This dish pairs wonderfully with a variety of sides and garnishes, allowing for customization depending on your preference or the occasion.
Accompaniments
Garlic rice, with its rich flavor and fluffy texture, serves as an excellent base for numerous dishes. Here are some of our favorite pairings:
- Grilled or Roasted Proteins: Think grilled chicken, roasted pork, or seared tofu for a vegetarian option. The simplicity of garlic rice complements the complex flavors of marinated and cooked meats or alternatives beautifully.
- Vegetable Stir Fry: A colorful, crunchy vegetable stir fry alongside garlic rice not only adds a vibrant visual appeal but also enhances the meal’s nutritional value.
- Seafood: Garlic rice and seafood are a match made in heaven. Whether it’s pan-seared shrimp, grilled salmon, or a hearty seafood stew, the garlic in the rice brings out the seafood’s natural flavors.
- Soups and Stews: Serve garlic rice as a side with rich, hearty soups and stews for a comforting meal that’s both filling and flavorful.
Garnishing Tips
To elevate the presentation and add an extra layer of texture and flavor to your garlic rice, consider these garnishing tips:
- Fresh Herbs: A sprinkle of freshly chopped parsley, cilantro, or scallions not only adds a pop of color but also a fresh flavor contrast to the warm, garlicky rice.
- Crispy Fried Garlic: For garlic enthusiasts, topping your rice with additional crispy fried garlic adds a delightful crunch and an intense garlic flavor.
- Nuts and Seeds: Toasted almonds, peanuts, or sesame seeds can add a nutty flavor and a crunchy texture, offering a pleasant contrast to the soft rice.
- Citrus Zest: A light grating of lemon or lime zest over the finished dish can introduce a bright, refreshing note, balancing the rich garlic flavor.
Incorporating these serving suggestions and garnishing tips, we guarantee your garlic rice will not only taste delicious but also look irresistible on the table. Whether it’s a casual family dinner or a special gathering, garlic rice prepared in a rice cooker is sure to impress.
Make-Ahead Instructions
When planning meals in advance, garlic rice stands out as an excellent choice for its ability to maintain flavor and freshness. Here’s how to prepare garlic rice ahead of time, ensuring that you can enjoy this delightful dish with minimal hassle during your busy week.
- Cook the Rice: Follow the initial steps to cook your rice in the rice cooker. Ensure the rice is slightly firmer by reducing the water by a quarter cup. This adjustment prevents the rice from becoming too soft or mushy when reheated.
- Prepare the Garlic: Sauté the garlic as directed, but slightly undercook it to a golden color. It will cook further upon reheating, allowing it to reach the perfect level of crispiness without becoming bitter or burnt.
- Combine and Store: Once the garlic and rice are prepared, mix them as you would if serving immediately. Allow the mixture to cool completely to room temperature to prevent condensation and moisture buildup.
- Refrigeration: Transfer the cooled garlic rice into an airtight container. It can be stored in the refrigerator for up to 3 days. This method preserves the rice’s texture and the garlic’s vibrant flavor.
- Reheating: To reheat, sprinkle a tablespoon of water over the rice to reintroduce moisture. Microwave it covered for 2-3 minutes, stirring halfway through, or reheat it in a skillet over medium heat for about 5 minutes. If using a skillet, you may add a small amount of oil or butter to prevent sticking and to add an extra layer of flavor.
These make-ahead instructions for garlic rice ensure that you have a quick and delicious side dish ready to accompany any meal. The preparation and storage tips guarantee the dish will taste just as fresh as if it were made moments ago, making your meal planning both efficient and enjoyable.
Leftover Storage Tips
After enjoying a delicious serving of garlic rice, you’ll often find yourself with leftovers. Proper storage is key to maintaining the dish’s texture and flavor. Let us walk you through some effective tips for storing your leftover garlic rice, ensuring it remains just as appetizing for your next meal.
Cooling Down
Start by allowing the garlic rice to cool down to room temperature. It’s crucial to avoid storing warm rice directly in the refrigerator as it can lead to moisture build-up, creating an environment ripe for bacterial growth. Spread the rice out on a large plate or baking sheet to expedite the cooling process, ensuring it doesn’t sit out for more than two hours to prevent any food safety issues.
Airtight Containers
Once cooled, transfer the garlic rice into airtight containers. These containers not only prevent the rice from absorbing other flavors from your fridge but also keep moisture out, which is essential for maintaining the rice’s ideal texture. Pressing a piece of parchment paper directly on the surface of the rice before sealing the container can further help in minimizing air exposure.
Refrigeration
Place the airtight containers in the refrigerator, where the garlic rice can be safely stored for up to 5 days. The cold environment slows down the degradation process, preserving both the rice’s flavor and texture. Remember to label the containers with the storage date to keep track of its freshness.
Freezing for Longer Storage
For those looking to keep their garlic rice longer, freezing is an excellent option. Portion the rice into serving sizes, wrap each portion tightly in plastic wrap, and then place them in airtight freezer bags. This method preserves the rice for up to 2 months. When you’re ready to enjoy it again, thawing overnight in the refrigerator or using the microwave’s defrost setting yields the best results.
Reheating
When it’s time to reheat your garlic rice, adding a tablespoon of water per cup of rice can help restore its moisture, preventing it from drying out. Cover and microwave in short intervals, stirring in between, until it’s evenly heated. This step ensures your garlic rice tastes as fresh as when it was first made.
By following these storage tips, you’ll be able to enjoy your garlic rice for days or even months after the initial meal. This not only saves time but also ensures you always have a flavorful and convenient side dish ready at a moment’s notice.
Conclusion
We’ve walked through the delightful journey of making garlic rice right in our rice cookers – a process that’s both simple and rewarding. Our guide aimed to not only share a recipe but also to sprinkle in tips that make this dish a standout. From cooking the garlic to perfection before pairing it with rice to the art of storing leftovers, we’ve covered it all. Whether you’re planning ahead or looking for ways to keep that garlic rice tasting great days later, we hope our advice helps you enjoy this flavorful dish anytime you crave it. Let’s keep making mealtime a little more special with these easy yet delicious culinary adventures.
Related Posts:
- Easy Garlic Rice in Rice Cooker: From Prep to Leftover Tips
- Quick Guide: Making Flavorful Japanese Butter Rice & Storage Tips