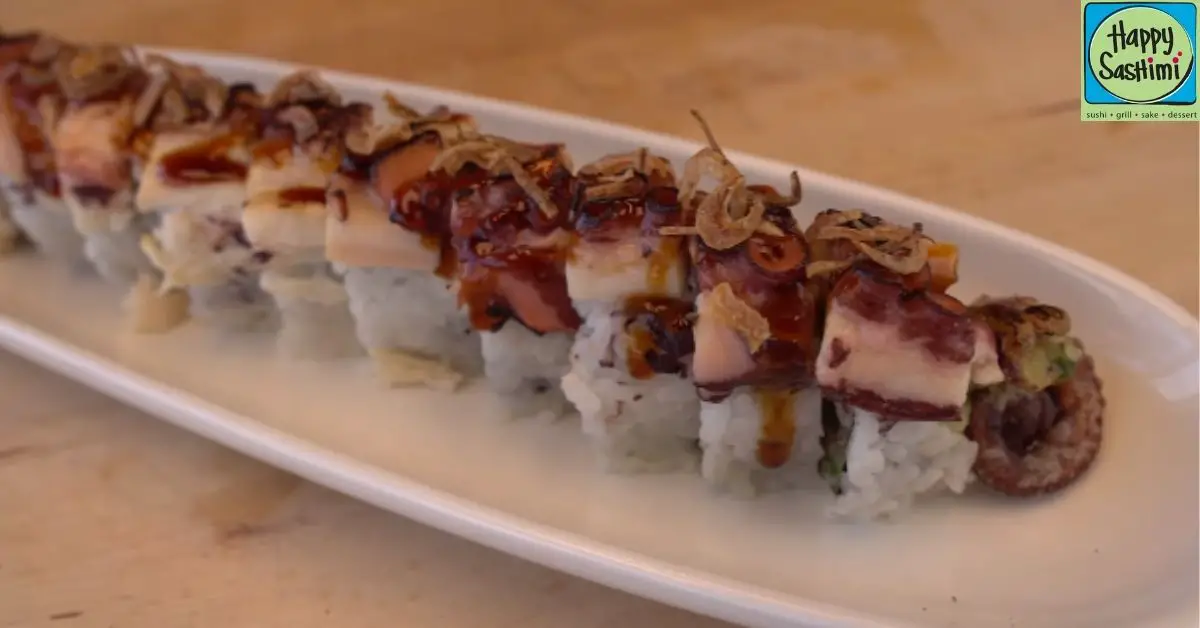
We’re diving deep into the ocean’s treasures to bring a unique twist to your sushi night with our octopus sushi roll recipe. This delicacy, blending the tender, slightly sweet flavors of octopus with the classic sushi roll, promises an adventure for your palate. It’s a fantastic way to introduce a bit of gourmet flair into your home cooking, especially if you’re looking to impress.
Originating from Japan’s rich culinary landscape, octopus sushi is not just food; it’s an art form, a balance of flavors, textures, and aesthetics. We’ve simplified the process, making it accessible for sushi enthusiasts of all levels. Whether you’re a seasoned chef or a curious beginner, we’re excited to guide you through crafting this exquisite dish. Join us as we explore the beauty and simplicity of making octopus sushi rolls, a journey that’s as rewarding to create as it is to savor.
Ingredients for Octopus Sushi Roll
Diving deeper into this culinary adventure, we’ve compiled a list of essential ingredients. This ensures that every bite of the octopus sushi roll is a harmonious blend of flavors and textures, promising an unforgettable experience.
Octopus Preparation
For the star ingredient:
- 1 medium-sized octopus tentacle (about 6-8 ounces), precooked
- 2 tablespoons of sake
- 1 tablespoon of soy sauce
- Salt, for boiling water
Sushi Rice
To create the perfect sushi rice:
- 1 cup of sushi rice
- 1 1/4 cups of water
- 2 tablespoons of rice vinegar
- 1 tablespoon of sugar
- 1/2 teaspoon of salt
Roll Fillings
For the filling:
- 1/2 of a cucumber, julienned
- 1 avocado, sliced thinly
- 2 sheets of nori (seaweed)
- Pickled ginger, to taste
For the serving:
- Soy sauce, for dipping
- Wasabi, to taste
- A small handful of sesame seeds, toasted
- Thinly sliced scallions, for garnish
Required Tools and Equipment
To embark on this culinary journey of crafting the perfect octopus sushi roll, there are a few essential tools and pieces of equipment that we’ll need to gather. Ensuring we have these items on hand will make the preparation process smoother and enhance our sushi-making experience. Here’s what we’ll need:
- Bamboo Sushi Mat: This is crucial for rolling our sushi evenly and tightly. It helps in achieving that professional sushi shape and texture.
- Sharp Knife: A sharp knife is vital for cutting our octopus and other ingredients finely. It’s also essential for slicing the finished roll into neat pieces without squashing them.
- Rice Cooker or Pot: For cooking the sushi rice to perfection. A rice cooker is ideal for consistent results, but a pot and some careful attention can do the job too.
- Rice Paddle or Spatula: After cooking, we’ll use this to mix the sushi rice with the vinegar seasoning. A wooden paddle is traditional, but any spatula will work.
- Mixing Bowl: Needed for seasoning the rice. Choose a non-metallic bowl to avoid any reaction with the vinegar.
- Sushi Grade Octopus: While not a tool, sourcing sushi-grade octopus is critical for both the quality and safety of our sushi.
- Vegetable Peeler: We’ll use this to slice the cucumber into thin strips for the filling.
- Clean, Damp Cloth: Keeping our hands moist and clean is important to prevent the rice from sticking as we assemble our rolls.
- Serving Plates: Choose plates that complement the aesthetic appeal of sushi for presenting our creation.
Gathering these tools and equipment before we start cooking will help us stay organized and focused on the art of making sushi. Each item plays a pivotal role in transforming our ingredients into a beautifully crafted octopus sushi roll, ensuring every bite is a testament to our culinary skills and passion for Japanese cuisine.
Preparing the Octopus
Diving into the heart of our octopus sushi roll recipe, the preparation of the octopus is a crucial step. This process ensures the octopus is tender, flavorful, and ready to be the star of our sushi roll.
Cleaning the Octopus
First, we’ll start by cleaning the octopus. Place the octopus under cold running water to rinse off any debris or sand. Then, remove the beak by locating the point where the tentacles meet and pushing it out from the inside. It should pop out quite easily with a little pressure. Next, check the inside of the head and remove any internal parts, ensuring it’s completely clean. This step is vital for a clean taste and texture in our sushi roll.
Boiling the Octopus
After cleaning, it’s time to boil the octopus to achieve the perfect tenderness. Fill a large pot with water and bring it to a rolling boil. Add a pinch of salt and a splash of vinegar – this helps tenderize the octopus and keeps the color vibrant. Carefully submerge the octopus into the boiling water. You can shock it initially by dipping it three times before fully submerging it. This technique helps curl the tentacles for a more appealing presentation in the sushi roll. Let it simmer gently for about 90 minutes, or until the octopus becomes tender. Check its tenderness by inserting a skewer into the thickest part of a tentacle; it should go through with little resistance. Once tender, remove the octopus from the pot and let it cool to room temperature. This boiling process is crucial for achieving the desired texture in our sushi roll.
Slicing the Octopus for Sushi Roll
With the octopus cooked and cooled, it’s time to prepare it for the sushi roll. Take a sharp knife and slice the tentacles into thin rounds, about 1/8-inch thick. Smaller pieces ensure a balanced distribution of octopus throughout the roll, enhancing the overall flavor profile. If you’re using the head, slice it into similar thin pieces. The goal is to have uniform slices that blend seamlessly with the other ingredients in the sushi roll. These tender, thinly sliced pieces of octopus are then ready to be incorporated into our sushi roll, adding a unique taste and texture that makes this dish truly special.
Making Sushi Rice
After ensuring our octopus is prepped and ready, we’ll now turn our attention to crafting the perfect base for our sushi rolls – the sushi rice. This next step is pivotal; the rice must be flawless, as it’s the foundation that ties all the ingredients together.
Washing the Rice
First things first, let’s get our sushi rice into pristine condition. For this recipe, we’ll need 2 cups of sushi or short-grain rice. Begin by placing the rice in a large bowl and covering it with cold water. Gently stir the rice with your hands, then drain the water. Repeat this process 3-4 times, or until the water runs relatively clear. This washing step is crucial for removing the excess starch, which in turn ensures our sushi rice will have just the right texture – sticky yet individual grains remaining distinct and not mushy.
Cooking the Rice
Next, transfer the washed rice into a rice cooker or pot. Add 2 and a quarter cups of water. If using a pot, cover and bring the rice to a boil over a high flame, then reduce to a low flame and let it simmer for 10 minutes. After simmering, remove it from the heat but keep it covered for another 15 minutes. This lets the rice steam and become perfectly tender. If you’re utilizing a rice cooker, simply follow the machine’s instructions for white rice.
Seasoning the Rice
Once our rice is cooked and slightly cooled, it’s time to season it to achieve that signature sushi rice flavor. We’ll need a mix of 1/4 cup rice vinegar, 2 tablespoons sugar, and 1/2 teaspoon salt. Heat this mixture until the sugar dissolves. Then, transfer the rice to a large bowl – traditionally, a wooden bowl called a Hangiri is used, but any large bowl will do. Sprinkle your vinegar mix over the rice. Use a rice paddle or a wide spatula to gently fold the seasoning into the rice, being careful not to mash the grains. It’s important to cool the rice to room temperature before using it for our sushi rolls. A pro tip is to fan the rice while mixing the seasoning in, this helps it cool faster and gives it a nice shine.
Now that our sushi rice is perfectly seasoned and cooled, we’re all set to assemble our octopus sushi rolls. This rice will not only complement the flavors of our tender octopus but also enhance the overall texture and taste of our sushi.
Assembling the Octopus Sushi Roll
Now that we have our octopus prepared and our sushi rice seasoned to perfection, it’s time to bring all the components together to form the delicious octopus sushi roll.
Preparing the Nori
First, we need to prepare the nori (seaweed sheet) for assembly. Place a single nori sheet on a bamboo sushi mat, ensuring the shiny side is facing down. This orientation is crucial as it impacts the roll’s presentation and texture. If the nori sheet is too large for your roll, use kitchen scissors to trim it to the desired size, keeping the proportions in mind for a consistent roll.
Spreading the Rice
Let’s spread the sushi rice over the nori. Wet your hands to prevent the rice from sticking, then take a handful of seasoned sushi rice. Gently spread the rice over the nori sheet, leaving about a 1-inch margin at the top edge so the roll can seal properly. Ensure the layer of rice is thin and even; a heavy-handed approach can make the roll too bulky and difficult to eat.
Adding Fillings
It’s filling time! Lay slices of boiled octopus in a line across the center of the rice. Add a thin slice of avocado next to it for creaminess and cucumber strips for a crunchy texture. Be mindful not to overfill; too many ingredients can make the roll challenging to seal and keep intact.
Rolling the Sushi
With all the fillings in place, it’s time to roll. Grab the edge of the mat closest to you, keeping the fillings in place with your fingers, and roll it over the fillings tightly. Once the roll is initiated, pull away the mat slightly and continue rolling, applying even pressure to ensure the roll is compact. When you reach the end of the nori with the exposed margin, moisten it slightly with water to help seal the roll.
Cutting the Roll
Finally, with a sharp knife, slice the roll into bite-sized pieces. Wet the knife between cuts to prevent rice from sticking and to ensure a clean slice through the nori. Each piece should be about an inch thick, showing off the cross-section of beautifully arranged octopus, avocado, and cucumber. Place the sushi pieces on a plate, serve with soy sauce, pickled ginger, and wasabi on the side, and enjoy the fruits of your labor – a delicious octopus sushi roll that’s sure to impress.
Serving Suggestions
After meticulously crafting your octopus sushi rolls, the final touch involves serving them in a way that enhances their appeal and taste.
Plating
When it comes to plating, we believe in the beauty of simplicity and the power of presentation. Arrange your sliced octopus sushi rolls on a minimalist, Japanese-inspired plate to let their colors stand out. Space them slightly apart, showcasing the intricate layers and textures. A small mound of pickled ginger and a dab of wasabi on the side not only add a pop of color but also offer taste contrasts that enhance the overall sushi experience. For a final touch, garnish with a sprinkle of sesame seeds or a few delicate sprigs of microgreens. This not only adds to the visual appeal but introduces a subtle flavor and texture contrast.
Sauce Pairings
Pairing the right sauce with your octopus sushi rolls can elevate the dish to new heights. Traditionally, soy sauce is a must-have for its salty depth, complementing the delicate flavors of the sushi. For a twist, consider a ponzu sauce, which adds a citrus note that beautifully balances the rich taste of the octopus. Another excellent pairing is a slightly spicy mayonnaise-based sauce, such as spicy mayo or sriracha mayo, which introduces a creamy texture and a kick of heat that contrasts nicely with the cool, crisp ingredients of the sushi roll. Offer these sauces in small, individual dipping bowls, allowing everyone to customize their sushi experience to their liking.
Make-Ahead Instructions
When planning to delight your guests with our octopus sushi rolls at a gathering, some steps can be prepared ahead to save time and ensure a smooth assembly process. Here’s how we can prep some components of our sushi rolls in advance, ensuring they’re just as delicious when it’s time to serve.
Preparing the Octopus
- Clean and Boil: Up to two days before your event, clean the octopus thoroughly under cold running water, and then boil it according to the recipe instructions. Once cooked, let it cool, slice it into the needed dimensions, and store it in an airtight container in the refrigerator. This step locks in the flavor and tender texture, making it ready to slice onto the sushi rice at a moment’s notice.
- Marinate for Extra Flavor (Optional): After boiling and cooling the octopus, consider marinating it in a mixture of soy sauce, mirin, and a dash of sesame oil for an enhanced flavor. Keep it refrigerated in the marinade to allow the octopus to absorb the flavors, giving your sushi rolls an extra zing.
Preparing the Sushi Rice
- Wash and Cook: Cook your sushi rice a day ahead. Remember, perfect sushi starts with perfectly seasoned rice. Once cooked, season it with the sushi vinegar as you would normally do, then allow it to cool to room temperature before storing it in an airtight container in the fridge.
- Re-Fluffing: Before assembling your sushi rolls, gently re-fluff the sushi rice with a fork to break up any clumps. If the rice seems a bit hard from refrigeration, a quick, gentle steaming or a brief 10-second zap in the microwave with a damp paper towel over it can bring back its pliable and soft texture necessary for spreading on the nori.
Preparing the Roll Fillings
- Slice Veggies: Cucumber and avocado slices can be prepared a few hours in advance. To prevent the avocado from browning, lightly coat the slices with lemon juice and store both veggies tightly wrapped in plastic wrap or in an airtight container in the refrigerator.
- Nori Sheets: Keep nori sheets in their original packaging until it’s time to assemble to maintain their crispness. If you’re in a humid environment, you might want to store them with silica gel packets to absorb any excess moisture.
Conclusion
We’ve walked through the delightful journey of making an octopus sushi roll from scratch. With each step, from preparing the octopus to the final plating, we aimed to make the process as seamless and enjoyable as possible. Remember, the key to a perfect sushi roll lies not just in the freshness of the ingredients but in the love and care you put into preparing them. Whether you’re making it ahead of time or just in time for a gathering, these tips and tricks are designed to help you create a sushi roll that’s not only delicious but also a feast for the eyes. So grab your nori, rice, and octopus, and let’s make every sushi roll an occasion to remember. Happy rolling!
